Earlier in 2024 I started to learn how to weave on a warp weighted loom. Since this was my first attempt, I had to learn how to set it up before I could even get started with weaving. All in all, there was quite a lot to learn!
I spent a lot of time thinking about how I was going to tackle the project and trying to plan it out, but in the end I just kind of had to make a start without fully knowing what I was doing. I decided to would try and make a set of tea towels (kitchen towels) with blue and white stripes woven in tabby (plain) weave.
Equipment
I bought the loom itself from Jalea Ward over at Slightly Warped Looms . It is half-sized and measures around 1m x 1m. The working area itself is about 75cm x 60cm. It came with removable supports for the heddle bar and I bought the starter kit that included a guidebook, a half-sized sword beater, 6 warping pegs, a needle for attaching the warp to the warp-bar, and some cloth bags to use as weights.
I used some cotton string that I already had to attach the heddle bar to the warp, and I filled the bags with fine-grained gravel (I actually used ‘bird gravel’ because I didn’t want to drive to the building supply store!).
Yarn
Although my ultimate aim is to weave with flax and wool, I really didn’t want to invest in ‘nice’ yarn until I had a better idea of what I was doing. After reading a blog post by Curly N Yarny where she wove tea towels on a rigid heddle loom, I realized that if I used the same yarn, then I could aim to weave at a similar sett and see how that turned out.
I bought two cones of Cotton Kings Cone 500 8/4 100% cotton yarn from Hobbii. In case you’re curious, I used Aqua Tint (23) and Milk (02). These cones are huge at 500g and about 1,700m each, so I would have plenty left over in case I messed this up!
Creating and attaching the warp
Tea towels are not made to a standard size but are generally around 70cm x 50cm, so that’s what I was aiming for. I needed to add in extra yarn for shrinkage, take-up and waste. I knew shrinkage would be around 15-20% but I didn’t know how much to add for the others.

Before I prepared the warp, I spent some time thinking about the warping pattern and even made a spreadsheet diagram like Curly N Yarny did…except I completely forgot that MY threads were going to be doubled over and if I followed my plan, my warp was going to be doubled in size! Opps!
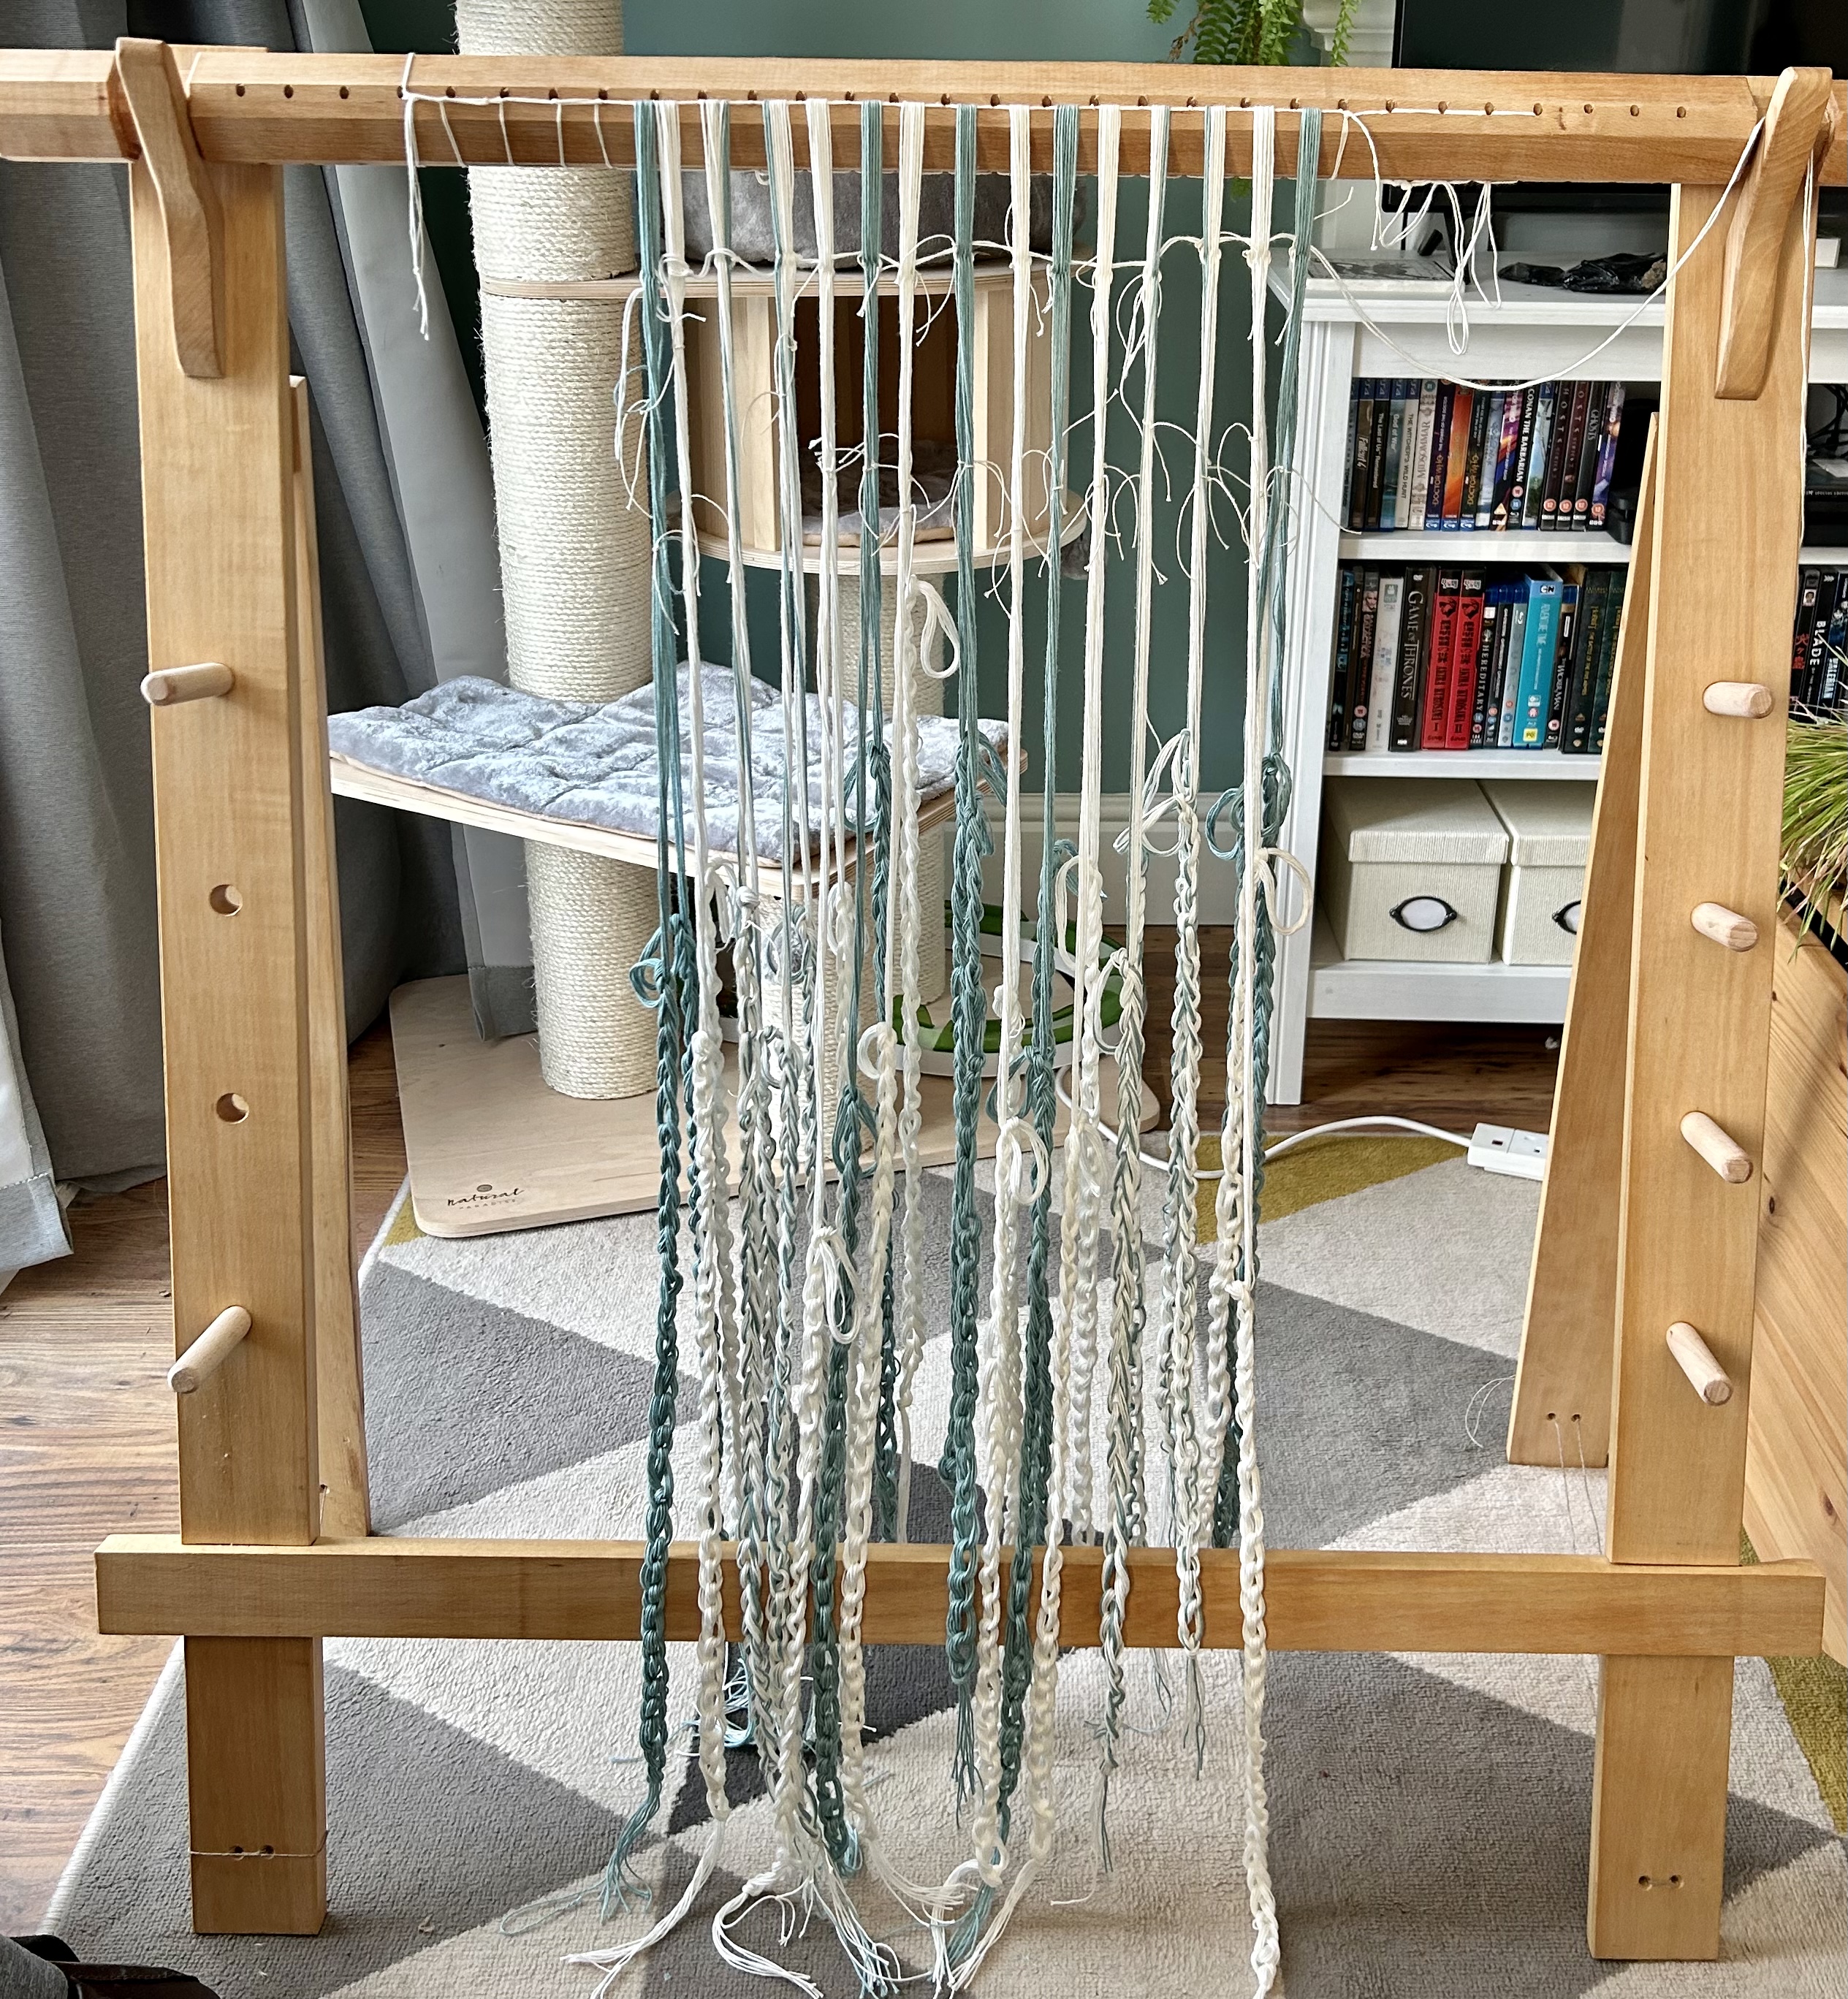
Anyways, I ended up using 240 threads for the warp and on the assumption that I was making two tea towels (because why not), I made the warp 3m long. Yes, this was huge, but I wasn’t sure how much buffer I was going to need between the two towels, plus I needed extra for the area below the heddle bar to attach to the weights and 3 is a nice round number.
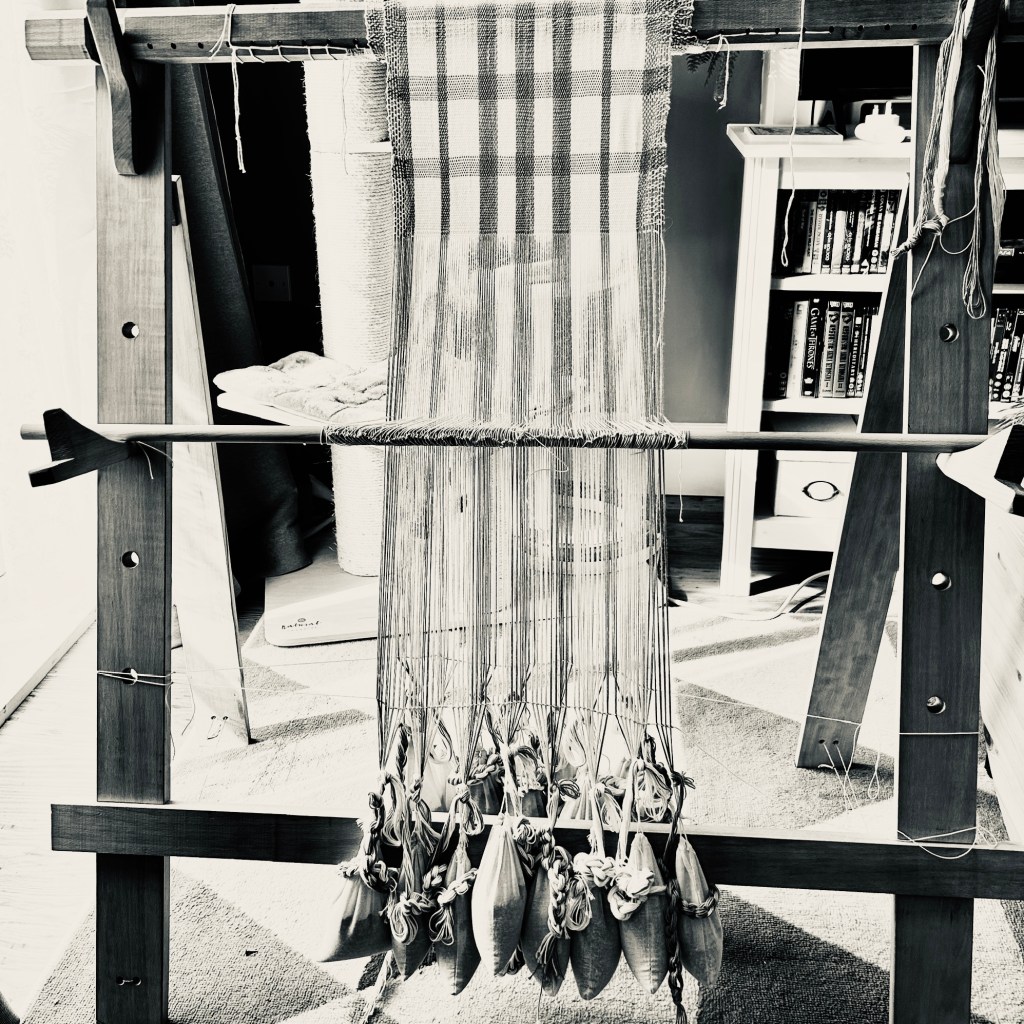
Setting up the warp wasn’t too difficult. I followed Jalea’s instruction booklet and watched Sally Pointer’s videos on the warp weighted loom. I attached my warp directly to the warp-beam by stitching it into place. I split the warp between 8 weights in the front and 8 in the back.

Weaving Test 1
My first attempt at weaving went…well…not terrible but not great if I’m honest! I was worried that by stitching the warp into place, as I did, that the weights would pull it down and I wouldn’t have a nice starting edge. This is exactly what happened and it also made it difficult to keep the tension correct while I was weaving. I had a really hard time keeping the sett even across the fabric because the warp threads kept pulling in towards the centre. This resulted in my woven piece becoming denser and denser in the middle and like netting on the selvedges. I was being really careful not to pull the weft in on the edges and I was making a big bubble with the weft thread before beating it into place.
I decided to call it quits after weaving just short of 50cm. The finished project was about 35cm across at the top and 27cm across at the bottom. Shrinkage after washing was about 10-15%.

To be continued…
So no, the first attempt wasn’t great but I got it done and learned a lot from going through the process, which is what it was about. I realise now that I was probably being *extremely* optimistic in thinking that I might be able to weave some tea towels straight off the bat!
But, because I put a massive warp onto my loom, it meant that I could continue weaving, learn from my mistakes, do some research and try out some new approaches in my next attempt(s). So more to come in my next post.
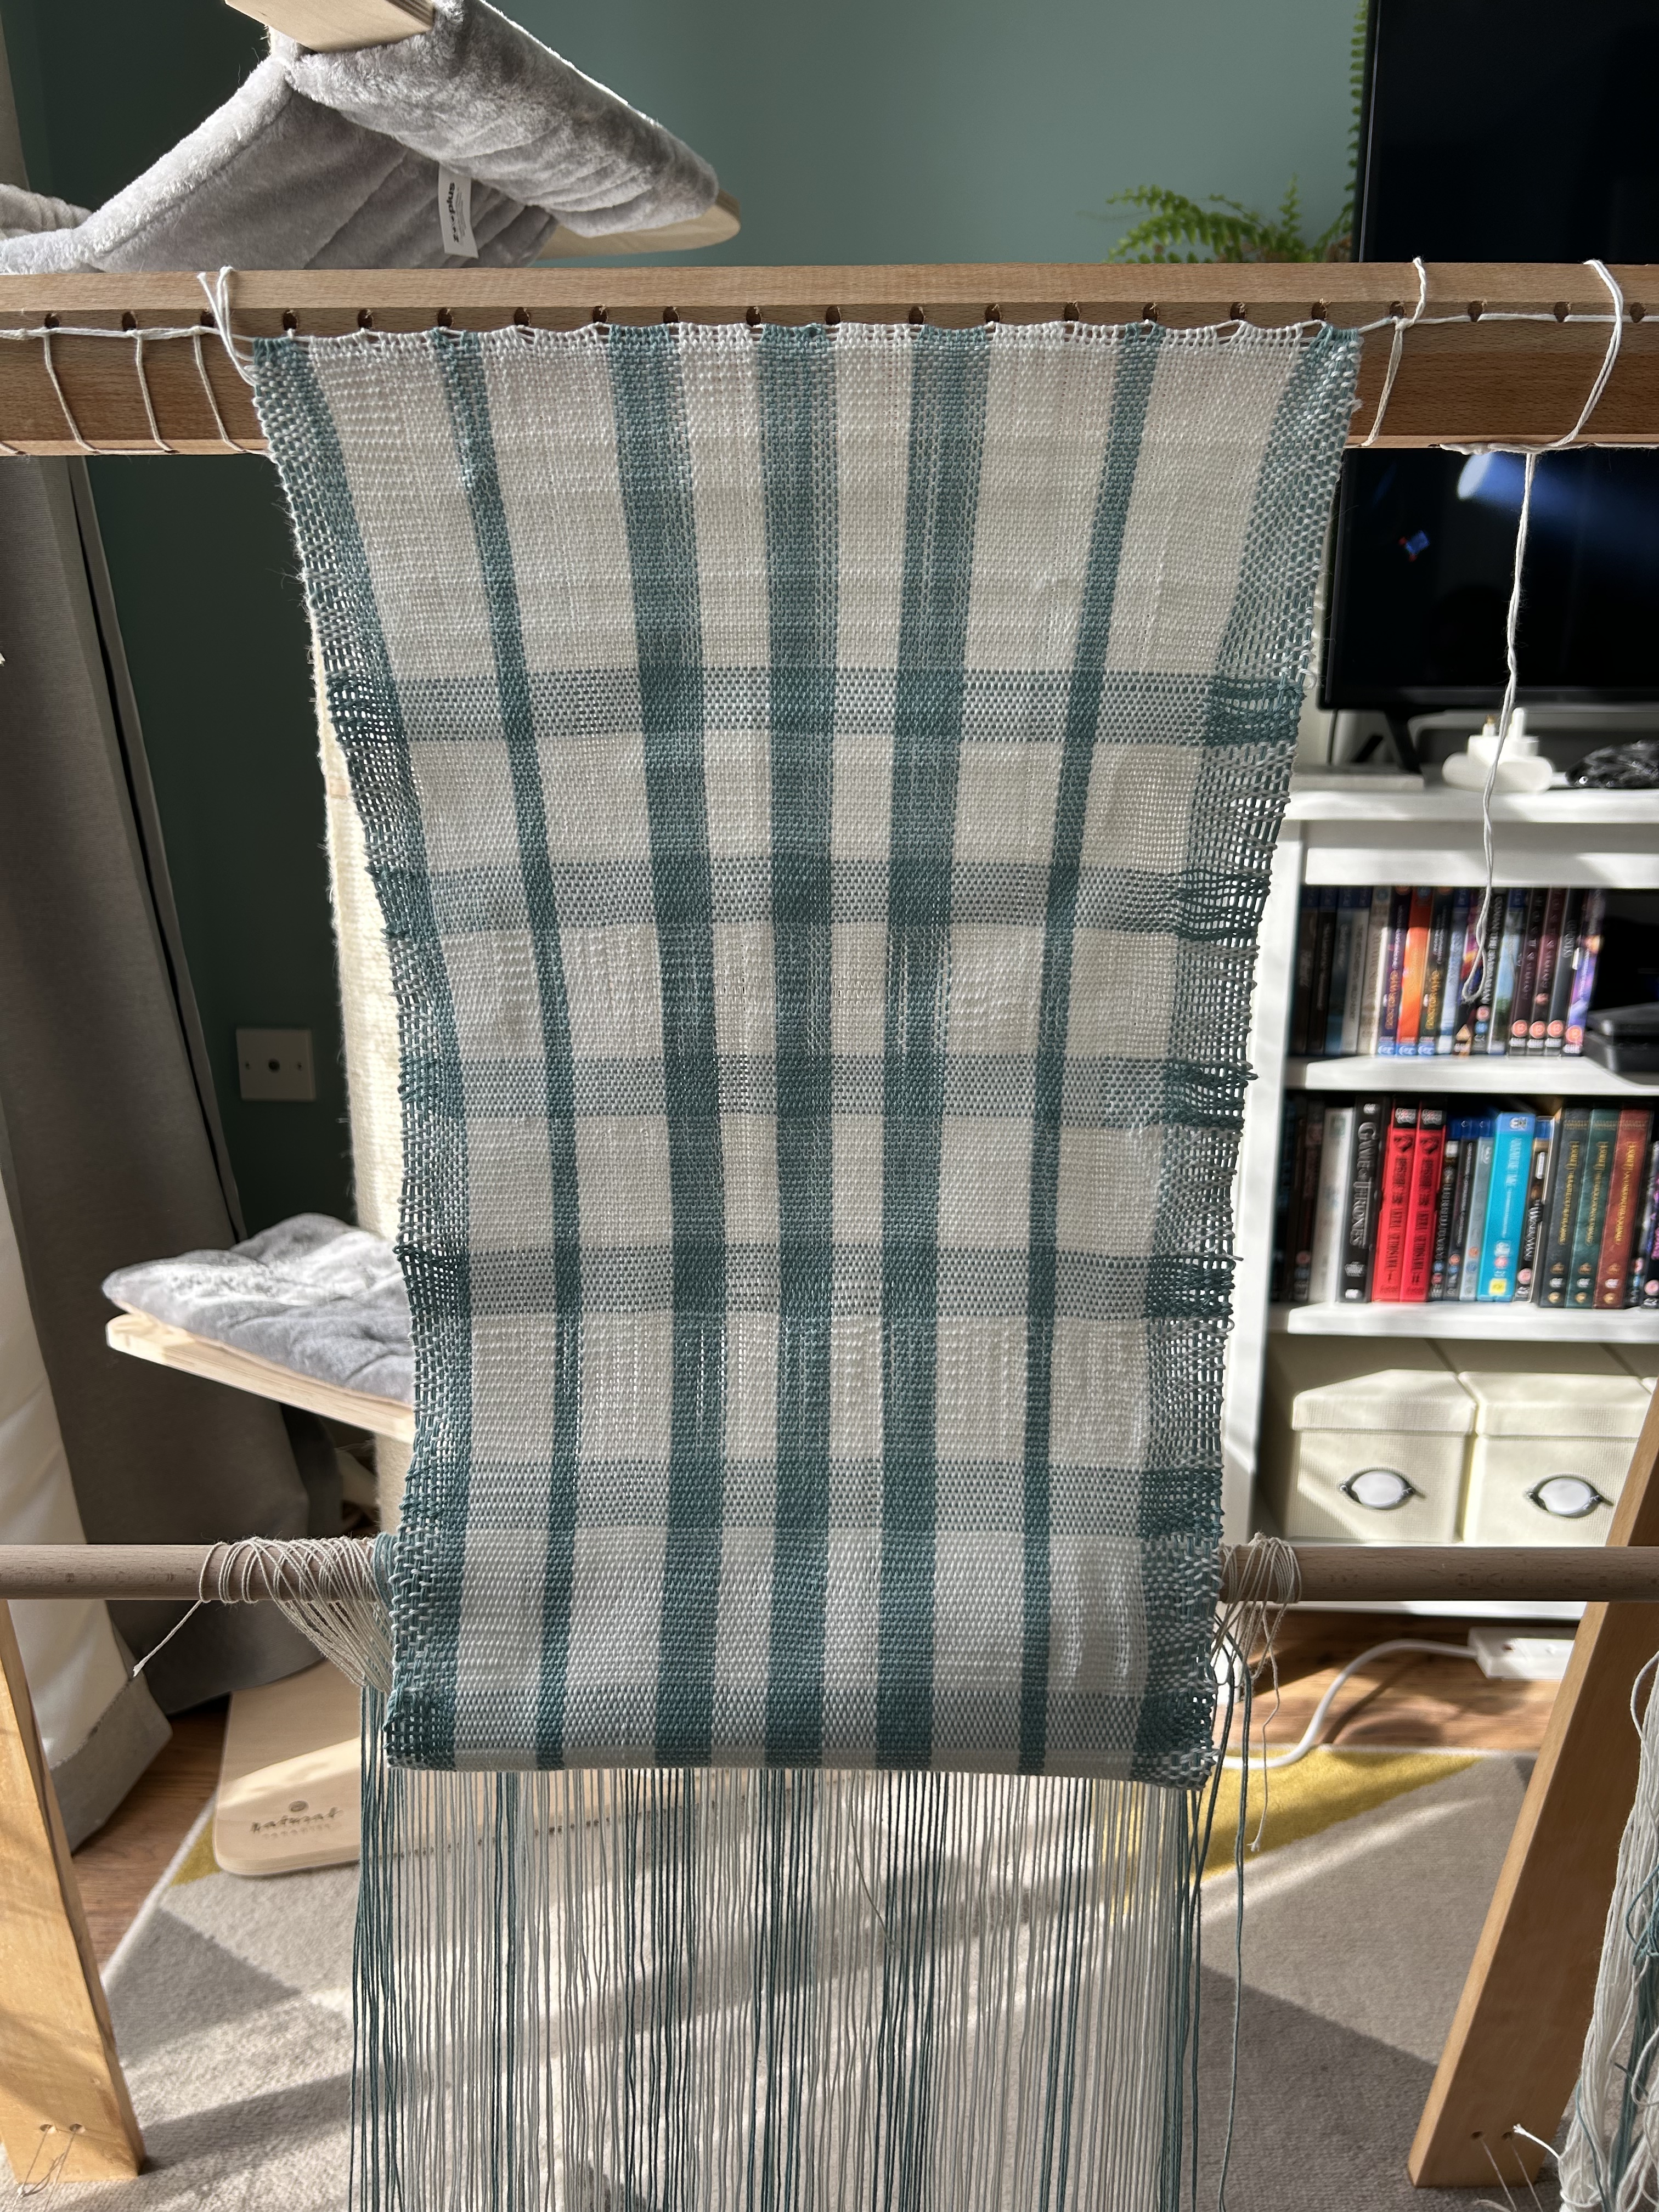

The completed first attempt on the loom and off.

Leave a reply to At last…a handwoven tea towel to call my own :) – Ancient Textile Craft Cancel reply